ECO mode TESLA MODEL X 2017 User Guide
[x] Cancel search | Manufacturer: TESLA, Model Year: 2017, Model line: MODEL X, Model: TESLA MODEL X 2017Pages: 198, PDF Size: 4.87 MB
Page 86 of 198

Restricted Speed
Autosteer is intended for use on freeways and
highways where access is limited by entry and
exit ramps. When using Autosteer on residential roads, a road without a centerdivider, or a road where access is not limited,
Autosteer limits the driving speed. The
maximum driving speed is calculated based
on the detected speed limit plus 5 mph (10 km/h). In situations where the speed limit
cannot be detected, speed is limited to 45 mph (70 km/h). When Autosteer is
engaged in these situations, it reduces your
driving speed and your set speed to be within
these limits. You can manually accelerate to exceed the limited speed, but when you
release the accelerator pedal, Autosteer slows
Model X to the limited speed. When you leave
the road, or disengage Autosteer by using the steering wheel, you can increase your set
speed again, if desired.
Hold Steering Wheel Autosteer uses data from the camera, sensors,
and GPS to determine how best to steer
Model X. When active, Autosteer requires you
to hold the steering wheel. If it does not detect your hands on the steering wheel for a
period of time, a
flashing white light appears
around the instrument panel and the following
message is displayed on the instrument panel:
Autosteer detects your hands by recognizing
light resistance as the steering wheel turns or
from you manually turning the steering wheel very lightly (i.e., without enough force toretake control). When your hands are
detected, the message disappears and Autosteer resumes normal operation.
Note: Autosteer may also sound a chime at
the same time that the message is initially
displayed.
Autosteer requires that you pay attention to your surroundings and remain prepared totake control at any time. If Autosteer still doesnot detect your hands on the steering wheel,the request escalates by sounding chimes that
increase in frequency.
If you repeatedly ignore hands-on prompts,
Autosteer displays the following message and
becomes disabled for the rest of the drive. If
you don
Page 100 of 198

How Speed Assist Works
If Model X is equipped with Autopilot
components (see About Driver Assistance on
page 76), the forward looking camera detects
speed limit signs. The signs are then analyzed
and compared against GPS data to determine
the speed limit at your current driving
location. For routes where no signs are
present, speed limits are determined using
GPS data (if available). Instead of determining
the speed limit based on signs and GPS data,
you can also manually enter an arbitrary speed limit.
When Speed Assist is turned on (described
below), the instrument panel displays a speed
limit sign. Warnings (described below) take
effect when you exceed this limit.
In situations where Speed Assist is unable to
detect a speed (for example, speed limit signs
and GPS data are not available at the current
location), or if Speed Assist is uncertain that
an acquired speed limit is accurate (for
example, although a speed limit sign was
initially detected, some time has passed
before a subsequent sign has been detected), the instrument panel may not display a speed
limit sign and warnings do not take
effect.
If you set the speed limit warning to Display
(see Controlling Speed Assist on page 99),
the speed limit sign on the instrumental panel
increases in size whenever you exceed the
speed limit.
If you set the speed limit warning to Chime (see Controlling Speed Assist on page 99)
and exceed the speed limit, you also hear a warning chime.
Note: Speed limit warnings go away after 10 seconds, or when Model X slows down below
the
specified limit.
Warning: Do not rely on Speed Assist to
determine the appropriate speed limit. Always drive at a safe speed based on
traffic and road conditions.
Controlling Speed Assist
To turn Speed Assist on or
off, and control
how it works, touch Controls > Settings >
Driver Assistance > Speed Limit Warning, then
choose one of these options:
Page 108 of 198

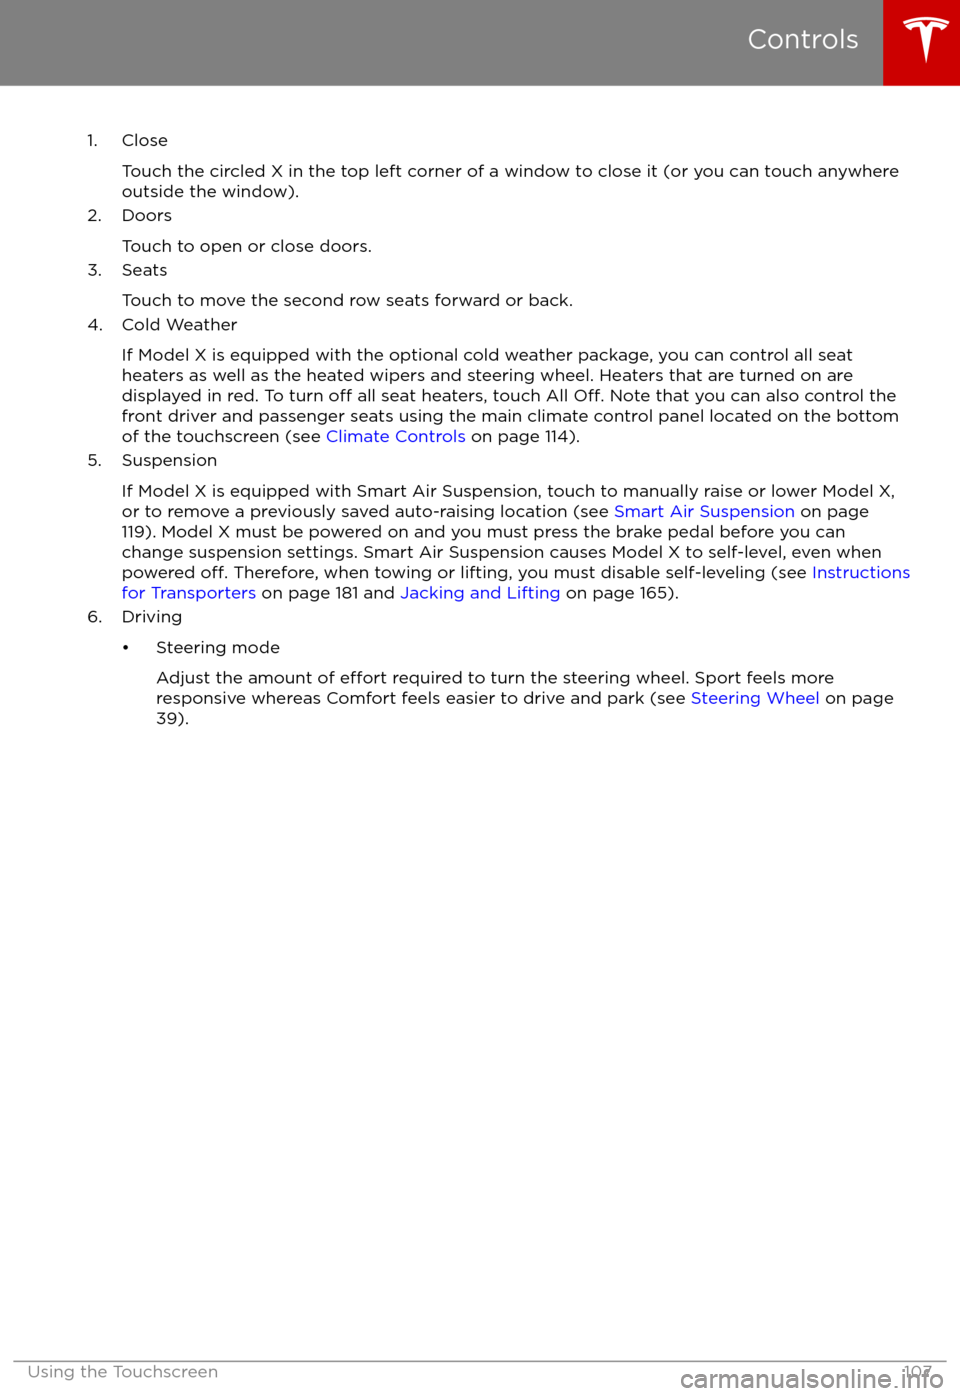
1. CloseTouch the circled X in the top left corner of a window to close it (or you can touch anywhere
outside the window).
2. Doors
Touch to open or close doors.
3. Seats
Touch to move the second row seats forward or back.
4. Cold Weather
If Model X is equipped with the optional cold weather package, you can control all seatheaters as well as the heated wipers and steering wheel. Heaters that are turned on are displayed in red. To turn
off all seat heaters, touch All Off. Note that you can also control the
front driver and passenger seats using the main climate control panel located on the bottom
of the touchscreen (see Climate Controls on page 114).
5. Suspension
If Model X is equipped with Smart Air Suspension, touch to manually raise or lower Model X,or to remove a previously saved auto-raising location (see Smart Air Suspension on page
119). Model X must be powered on and you must press the brake pedal before you can
change suspension settings. Smart Air Suspension causes Model X to self-level, even when powered
off. Therefore, when towing or lifting, you must disable self-leveling (see Instructions
for Transporters on page 181 and Jacking and Lifting on page 165).
6. Driving
Page 115 of 198

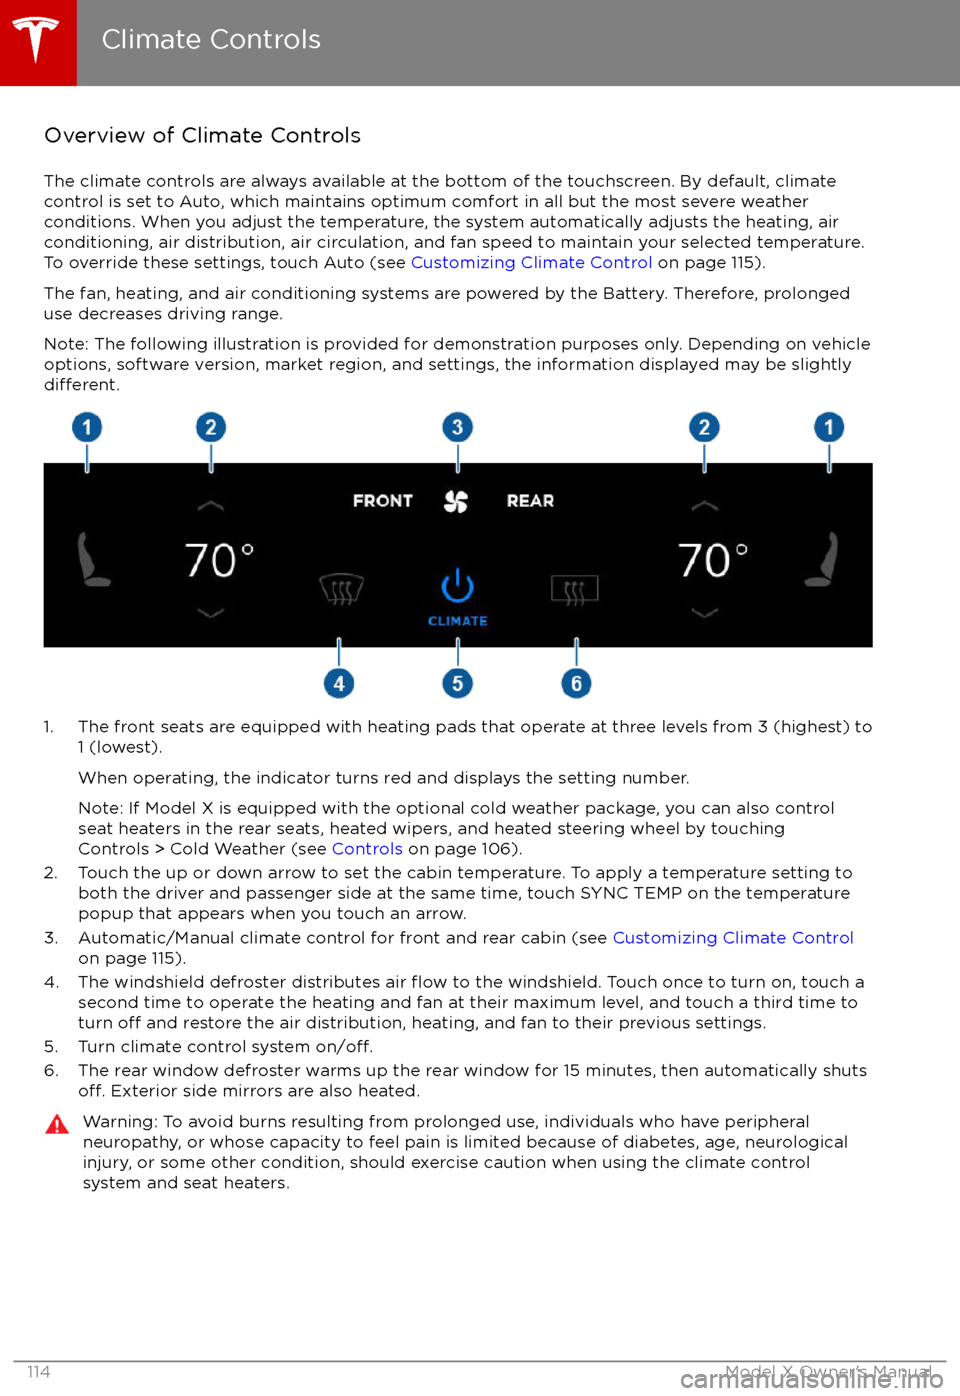
Overview of Climate Controls
The climate controls are always available at the bottom of the touchscreen. By default, climate control is set to Auto, which maintains optimum comfort in all but the most severe weather conditions. When you adjust the temperature, the system automatically adjusts the heating, air
conditioning, air distribution, air circulation, and fan speed to maintain your selected temperature. To override these settings, touch Auto (see Customizing Climate Control on page 115).
The fan, heating, and air conditioning systems are powered by the Battery. Therefore, prolonged
use decreases driving range.
Note: The following illustration is provided for demonstration purposes only. Depending on vehicle
options, software version, market region, and settings, the information displayed may be slightly
different.
1. The front seats are equipped with heating pads that operate at three levels from 3 (highest) to 1 (lowest).
When operating, the indicator turns red and displays the setting number.
Note: If Model X is equipped with the optional cold weather package, you can also control seat heaters in the rear seats, heated wipers, and heated steering wheel by touchingControls > Cold Weather (see Controls on page 106).
2. Touch the up or down arrow to set the cabin temperature. To apply a temperature setting to both the driver and passenger side at the same time, touch SYNC TEMP on the temperaturepopup that appears when you touch an arrow.
3. Automatic/Manual climate control for front and rear cabin (see Customizing Climate Control
on page 115).
4. The windshield defroster distributes air
flow to the windshield. Touch once to turn on, touch a
second time to operate the heating and fan at their maximum level, and touch a third time to
turn
off and restore the air distribution, heating, and fan to their previous settings.
5. Turn climate control system on/off.6. The rear window defroster warms up the rear window for 15 minutes, then automatically shutsoff. Exterior side mirrors are also heated.
Warning: To avoid burns resulting from prolonged use, individuals who have peripheral neuropathy, or whose capacity to feel pain is limited because of diabetes, age, neurologicalinjury, or some other condition, should exercise caution when using the climate control
system and seat heaters.
Climate Controls
114Model X Owner
Page 117 of 198

3. Choose how air is drawn into Model X:Outside air is drawn into Model X (see Ventilation on page 118).Air inside Model X is recirculated. This prevents outside air (traffic fumes)
from entering, but reduces dehumidifying performance. Recirculating the
air is the most
efficient way to cool the front cabin area. To prevent the
windshield from fogging in some conditions, briefly change the setting
every hour to draw in outside air.
If your Model X is equipped with the HEPA (High Efficiency Particulate
Air) filter, you can ensure the best possible quality of air inside the cabin.
When selected, outside air is drawn in and filtered through the medical-
grade HEPA filter in addition to the secondary filtration systems. The
HEPA filter is extremely effective at removing particles, including
pollution, allergens, bacteria, pollen, mold spores, and viruses. Both the
HEPA
filter and the secondary filtration system also contain activated
carbon to remove a broad spectrum of odors and gases. When you
engage the HEPA option, the fan operates at the highest speed. In
addition, the positive pressure inside the cabin minimizes the amount of
outside air that can leak into the vehicle.
Note: Some gases, such as carbon monoxide, are not
effectively removed
by activated carbon.
4. Choose where air flows into the cabin. You can choose more than one location:
Foot-level ventsFace-level ventsWindshield vents
Note: When air is directed to the foot-level vents, approximately one third of the air continues
to flow to the windshield vents to assist in defogging. However, when air is directed to the
face-level vents, no air flows to the windshield because the air flowing through the face-level
vents may be adequate to assist in defogging the windshield.
5. Touch the arrows to set the speed of the fan.
Note: Adjusting the fan speed may change the selected setting for how air is drawn intoModel X in order to increase or reduce
airflow.
Custom climate controls for the rear seating areas:
Climate Controls
116Model X Owner
Page 118 of 198

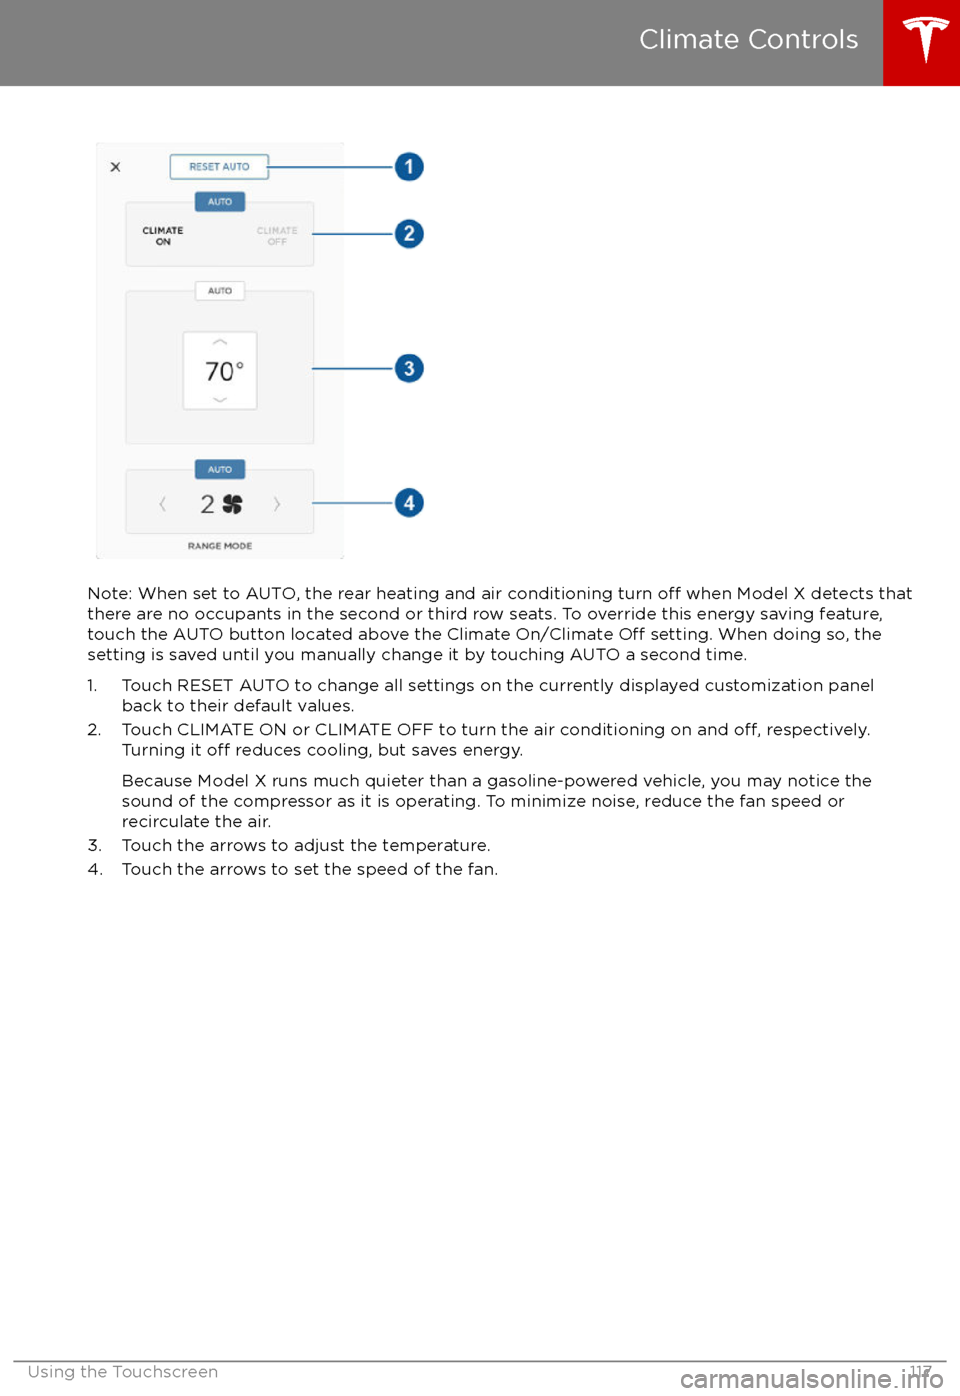
Note: When set to AUTO, the rear heating and air conditioning turn off when Model X detects that
there are no occupants in the second or third row seats. To override this energy saving feature,
touch the AUTO button located above the Climate On/Climate
Off setting. When doing so, the
setting is saved until you manually change it by touching AUTO a second time.
1. Touch RESET AUTO to change all settings on the currently displayed customization panel back to their default values.
2. Touch CLIMATE ON or CLIMATE OFF to turn the air conditioning on and
off, respectively.
Turning it off reduces cooling, but saves energy.
Because Model X runs much quieter than a gasoline-powered vehicle, you may notice the sound of the compressor as it is operating. To minimize noise, reduce the fan speed or
recirculate the air.
3. Touch the arrows to adjust the temperature.
4. Touch the arrows to set the speed of the fan.
Climate Controls
Using the Touchscreen117
Page 135 of 198

About the Security System
If Model X does not detect a key nearby and a
locked door or trunk is opened, an alarm sounds and headlights and turn signals
flash.To deactivate the alarm, press any button on the key.
To manually enable or disable the alarm system, touch Controls > Settings > Safety &
Security > Alarm. When set to on, Model X activates its alarm one minute after the doors
lock and a recognized key is no longer
detected nearby.
Security Settings
134Model X Owner
Page 138 of 198

Wi-Fi is available as a data connection methodand is often faster than cellular data networks.
Connecting to Wi-Fi is especially useful in areas with limited or no cellular connectivity.
To ensure fast, reliable delivery of Model X
updates (see Software Updates on page 138),
Tesla recommends leaving Wi-Fi turned on and connected to a Wi-Fi network. To connectto a Wi-Fi network:
1. Touch the 4G (or LTE) icon in the touchscreen status bar. Model X will start
scanning and display the Wi-Fi networks that are within range.
2. Select the Wi-Fi network you want to use, enter the password (if necessary), then
touch Connect.
You can also connect to a hidden network that
isn
Page 139 of 198

Loading New Software
Model X updates its software wirelessly,
providing new features throughout your term of ownership. Tesla recommends that you
install software update as soon as they are
available. The
first time you enter Model X
after an update is made available, a scheduling
window displays on the touchscreen. The
scheduling window displays again at the end
of your
first driving session.
Note: Some software updates can take from
two to three hours to complete. Model X must be in P (Park) when the new software is being
installed. To ensure the fastest and most
reliable delivery of software updates, leave the
Wi-Fi turned on and connected whenever
possible (see Connecting to Wi-Fi on page
137).
When a software update is available, a yellow
clock icon appears on the touchscreen
Page 152 of 198

Inspecting and Maintaining TiresRegularly inspect the tread and side walls for
any sign of distortion (bulges), cuts or wear.Warning: Do not drive Model X if a tire is
damaged, excessively worn, or inflated to
an incorrect pressure. Check tires
regularly for wear, and ensure there are
no cuts, bulges or exposure of the ply/
cord structure.
Tire Wear
Adequate tread depth is important for proper
tire performance. Tires with a tread depth less
than 4/32” (3 mm) are more likely to
hydroplane in wet conditions and should not
be used. Tires with a tread depth less than
5/32” (4 mm) do not perform well in snow and
slush and should not be used when driving in
winter conditions.
Model X is originally
fitted with tires that have
wear indicators molded into the tread pattern. When the tread has been worn down to 4/32”(3 mm), the indicators start to appear at thesurface of the tread pattern, producing the
effect of a continuous band of rubber across
the width of the tire. For optimal performance
and safety, Tesla recommends replacing tires
before the wear indicators are visible.
Tire Rotation, Balance, and Wheel Alignment
Model X tires cannot be rotated, as tires are
asymmetrical and front tires are a
differentsize from rear tires.
Unbalanced wheels (sometimes noticeable as
vibration through the steering wheel)
affectvehicle handling and tire life. Even with regular
use, wheels can get out of balance. Therefore,
they should be balanced as required.
If tire wear is uneven (on one side of the tire
only) or becomes abnormally excessive, check
the alignment of wheels.
Note: When replacing only two tires, always
install the new tires on the rear.
Punctured Tires
A puncture eventually causes the tire to lose pressure, which is why it is important to check
tire pressures frequently. Permanently repair
or replace punctured or damaged tires as
soon as possible.
Your tubeless tires may not leak when
penetrated, provided the object remains in the tire. If, however, you feel a sudden vibration or
ride disturbance while driving, or you suspect a tire is damaged, immediately reduce yourspeed. Drive slowly, while avoiding heavy
braking or sharp steering and, when safe to do so, stop the vehicle. Arrange to have Model X
transported to a Tesla service center, or to a
nearby tire repair center.
Note: In some cases, you can temporarily
repair small tire punctures (under 1/4” (6
mm)) using an optional tire repair kit available from Tesla. This allows you to slowly drive
Model X to Tesla or to a nearby tire repair
facility.Warning: Do not drive with a punctured
tire, even if the puncture has not causedthe tire to
deflate. A punctured tire candeflate suddenly at any time.
Flat Spots
If Model X is stationary for a long period in
high temperatures, tires can form
flat spots.
When Model X is driven, these flat spots cause
a vibration which gradually disappears as the
tires warm up and regain their original shape.
To minimize
flat spots during storage, inflatetires to the maximum pressure indicated on the tire wall. Then, before driving, release airto adjust tire pressure to the recommendedlevels.
Improving Tire Mileage
To improve the mileage you get from your
tires, maintain tires at the recommended tire
pressures, observe speed limits and advisory
speeds, and avoid: